DIY Corner – Engine Oil Change
Whether you’re driving a luxury car or 4×4 pickup truck, or anything in between, regular maintenance is the single most important thing that you can do to keep it running. A regular oil change is one of the most critical steps, and required every 3,000 to 6,000 miles, whether you’re running conventional oil or synthetic oil. The problem is that engine oil has a limited lifespan – it wears out and eventually loses its lubricating qualities.
Many people simply rely on their local trusted technician for an oil change, but we also realize that automobile service can be expensive. With the right parts and a bit of mechanical aptitude, a DIY oil change isn’t all that difficult. There’s also a certain satisfaction that comes from the ability to take care of your car yourself, even if you aren’t a master technician. Indeed, housewives, office managers, and landscapers can do an oil change in not much time at all.
Setting Up for Your Own Engine Oil Change
The first thing you need to do if you want to change your own engine oil is to look in the manual. The owner’s manual has critical information regarding what type of oil your engine requires and how much of it. If you don’t have your manual, your autoparts store might have this information or you can look it up online – JustGiveMeTheDamnManual.com is a great place to start.
After noting the relevant information, you’ll need oil change supplies, tools, and equipment, so head over to the autoparts store. Here’s your shopping list:
- Engine Oil – Use the weight and grade recommended by the manual. You can use conventional or synthetic oil, as available, but ensure the correct weight is being used, such as 5W-20 or 10W-30. Buy the right amount of oil for your engine. If the oil container bears the proper seals, such as those by ILSAC, ASTM, or API, it means the oil meets or exceeds industry standards for use in automobile engines.
- Engine Oil Filter – The oil filter should be changed at every oil change. Usually, a book at the autoparts store will tell you which oil filter has been designed for your vehicle, based on year, make, and engine size. You can also buy oil filters online or at the dealership.
- Jack, Ramps, Jack Stands – You’ll need to get under the vehicle to change the oil, so use a good jack or ramps to raise the vehicle. Use jack stands to support the vehicle while it is in the air.
- Hand Tools – At a minimum, you’ll need a wrench to remove the drain plug. You might also need an oil filter wrench or a screwdriver to gain access to the drain plug and oil filter.
- Funnel and Drain Pan – Use the drain pan to collect used oil for recycling – don’t just dump it on the ground! Use the funnel to keep from making a mess while refilling the engine.
- Rags or Paper Towels – Keeping things clean, both yourself and the car, is important! Some cardboard or a drop cloth may come in handy to keep the ground clean.
- Gloves and Safety Glasses – Nitrile gloves will keep your hands from getting dirty. Safety glasses will keep oil out of your eyes.
Step by Step Oil Change Service
Once you’ve gathered all your supplies, look for a place to change your oil. Any level flat spot on the driveway or garage will do, though some public places won’t appreciate you changing your oil in the parking lot.
- Temperature – The best time for an oil change is when the engine is warm, but not hot right off the highway. Warm oil flows better than cold, so you’ll get a more complete oil change, but hot oil might burn you if it splashes.
- Lift – Use the ramps or the jack to lift the front end of the car, then support it on the jack stands. Never put any part of your body under the vehicle until it is supported by jack stands. Wood blocks or cinder blocks are no substitute!
- Hood – Open the hood and remove the oil fill cap and oil dipstick.
- Drain – Place the drain pan under the engine drain plug and remove the plug. Doing so carefully, you should be able to capture all the oil without making a mess, but sometimes the first time can be, shall we say, “educational.” Once the oil slows to a few drips, replace the drain plug and torque it gently.
- Filter – Remove the used oil filter and check that the gasket is still attached to the filter. Clean the mounting surface, on the engine, with a rag. Lubricate the new oil filter seal with a little oil. Spin it on until it contacts the engine. Then, tighten the filter an additional one-half to three-quarters of a turn.
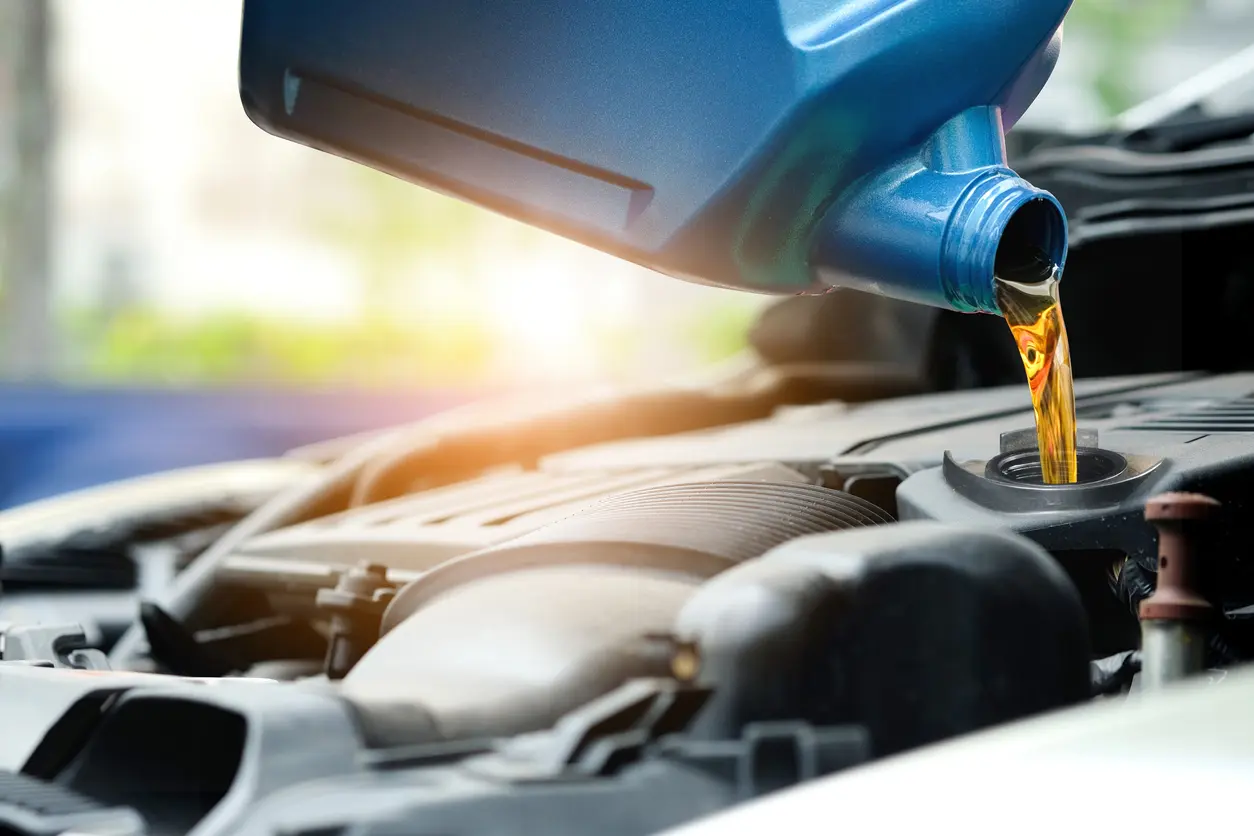
- Refill – Use the funnel and refill the engine, using the amount specified by the manual. Then, replace the oil fill cap. Use a rag to clean any spilled oil.
- Run – Start then engine and run it for five minutes. While the engine is running, look under the vehicle for oil leaks. If oil is leaking, stop the engine immediately and recheck your work, especially the oil filter and drain plug.
- Lower – Lower the vehicle and shut off the engine.
- Check – With the vehicle level and the engine off, pull the dip stick and clean it with a rag. Put in the dipstick and remove it and check that the oil level is correct. The manual will specify what the dipstick should look like. Add oil if needed to reach the full or safe marking.
- Recycle – Take the used oil to your local shop or autoparts store for recycling.
Dobbs Tire & Auto Centers is Here to Help
The oil change is probably the first thing that anyone learns about maintaining their cars, and there are plenty of other things that you can probably do yourself, as well, such as wiper blades, light bulbs, fuses, even brakes. If you have any questions about changing your own engine oil, or you get stuck, give us a call. At Dobbs Tire & Auto Centers, we’ve been taking care of St. Louis engines for forty years, and our knowledgeable ASE-Certified technicians can help you get your DIY oil change on track. Stop in one of our 43 locations to have one check your work.
